
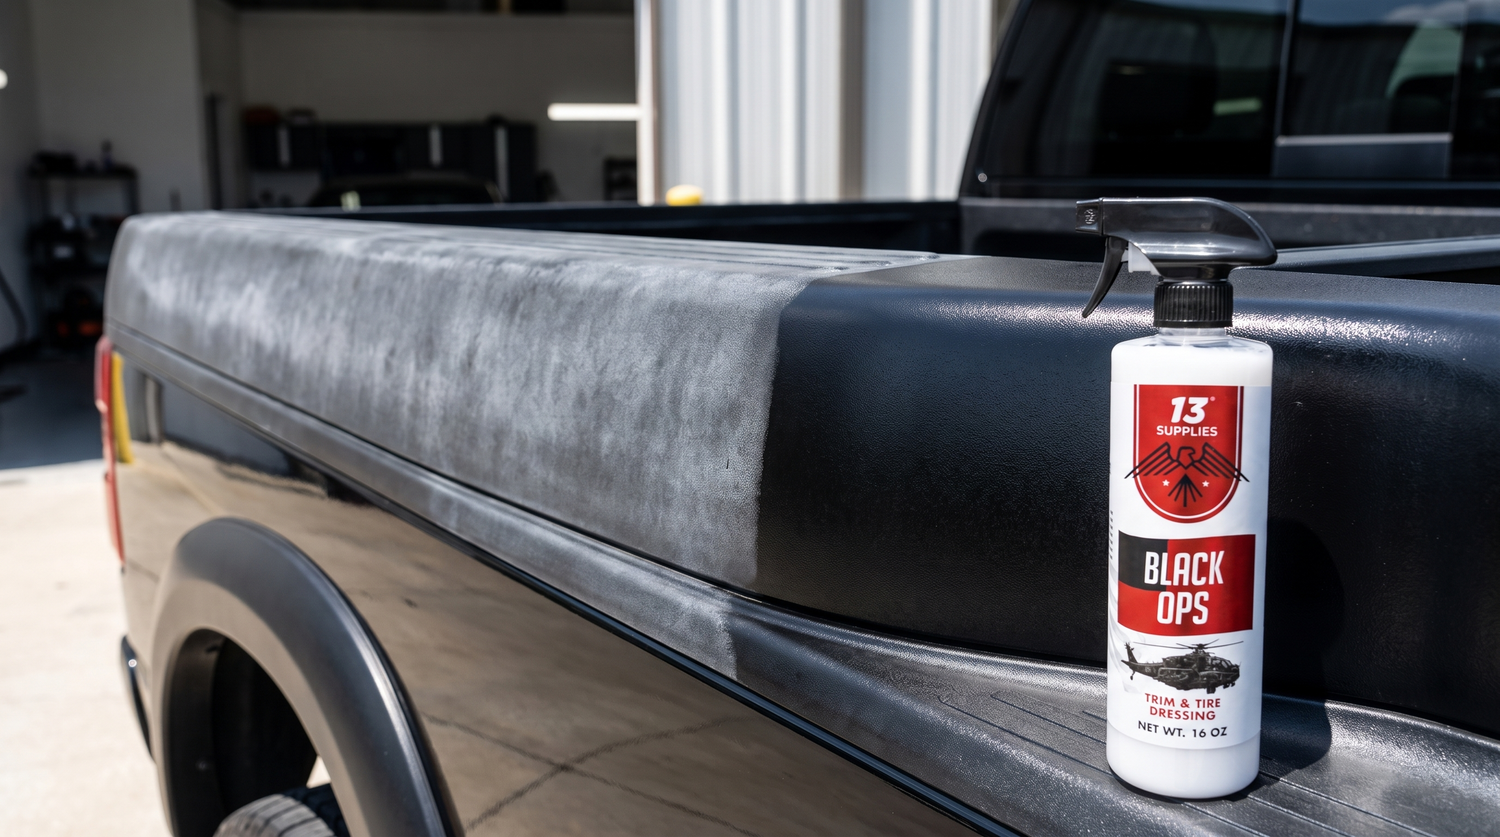
Nothing ages a truck faster than gray, chalky trim, even when the paint underneath still looks sharp. Here's the good part: you can bring that black back in an afternoon, right in your own driveway, no body shop required. The trick is doing it in order — clean, dry, restore, cure. Skip a step or grab the wrong product, and even the best restorer won't hold on a surface it can't bond to.
Why Plastic Trim Fades
Trim doesn't just fade for no reason. Two things work against it every time your vehicle sits out in the open.
UV Breaks Down Plasticizers
That deep black color and flexibility come from plasticizers mixed into the plastic at the factory. Sunlight slowly breaks those down, pulling the oil and moisture out of the surface until the plastic goes gray and chalky. That's why the sun-facing side of a truck almost always fades before the shaded side does.
Wax and Polish Residue
Wax and polish are made for paint, not plastic. Both tend to leave a white or gray film on trim when you wash, and that film sits right on top of plastic that's already faded, making the whole thing look worse. Plenty of folks figure their trim is ruined for good when it's really just wearing a coat of leftover product.
Tools and Supplies: What You'll Need to Restore Faded Black Trim
Get the right products in hand and you're the difference between a fix that lasts and one that's gray again in a couple weeks.
Heavy-Duty Cleaner
Start with a cleaner that can actually strip old wax, road grime, and oxidized residue off the trim. Soapy water and a rinse won't cut it. The 13 Supplies Independence Pack bundles the exterior cleaning and prep products for this step, so you're not standing in the garage guessing whether your cleaner is strong enough to break down the buildup without leaving more residue behind.
For Heavily Oxidized Trim, Prep With an Acid Cleaner First
Is your trim more chalky-gray than faded-black? That's deep oxidation, not just dust and film, and you'll want to hit it with Acid Machine Clean before anything else. It strips embedded oxidation off plastic and rubber the way regular soap simply can't, leaving the restorer a truly bare surface to grab onto. Follow the label and rinse it well.
Trim Restorer or Dressing
A trim restorer puts color and protection back into the plastic. A shine spray just lays temporary gloss on top, which isn't the same thing. Black Ops: Trim & Tire Dressing is built for exactly this. It's a polymer dressing made for tires, trim, fender flares, bed rails, rubber, and vinyl, and it brings faded black back to a satin, deep-black finish with real UV protection, zero sling, and no oily residue. That UV protection is the whole reason you don't repurpose an interior dressing out here. Outdoor trim takes a beating from the sun that indoor products were never made to handle.
Soft Cloths and a Foam Applicator
Keep a few clean microfiber cloths around for cleaning and wiping, plus a foam applicator to lay the restorer down evenly. Between those two products, you've got the whole job covered: the Independence Pack handles the clean, Black Ops handles the restore, and you're never left wondering whether two random products even play nice together.
Step 1: Clean the Trim First
Jumping straight to the restorer is the number one reason results don't last. Restorer has to bond with bare plastic, not with a layer of old wax and grime riding on top of it.
Wash Away Grease, Wax, and Road Film
Spray the cleaner right onto the trim and let it sit for a minute so it can break down the buildup before you wipe. Work it in with a soft cloth or brush, and pay attention to the textured and grooved sections where grime likes to hide. Then rinse it well. Any cleaner left behind can keep the restorer from sticking.

Step 2: Dry the Trim Completely
Wipe the trim down with a clean microfiber cloth, then give it a few extra minutes to air-dry before you move on. Lay restorer over damp plastic and it won't bond right, usually going patchy or streaky as it dries. Those extra minutes are worth it, even when the trim already looks dry to you.
Step 3: Apply the Restorer
Clean, dry trim, ready to go. Now for the product that does the real color and protection work.
Pro-Tip: Two Thin Coats Are Better Than One Thick Coat
Lay Black Ops down with a foam applicator or microfiber cloth in thin, even strokes, following the grain or texture in the plastic. Once the first coat sets, a second thin coat gives you more even coverage and better UV protection than one heavy coat ever will. Go too thick and it pools in the low spots and dries uneven.

Step 4: Wipe Off Excess
Go back over everything with a clean cloth and wipe up any restorer that pooled or dripped onto nearby paint. Left on paint, that excess can spot or leave a hazy film that's a real pain to buff out later. Catch it while it's still wet and you save yourself the trouble.
Step 5: Let Restorer Cure
Give it a full 24 hours before you wash the vehicle or drive it in the rain, if you can swing it. Curing is what lets the product fully bond to the plastic. Wash too soon and you'll strip off restorer that hasn't set, undoing most of what you just did.
Maintaining Restored Black Trim
A fresh finish won't stay perfect forever, so a little upkeep keeps the trim from sliding back to gray between full applications.
Reapply Every One to Three Months
Restorer wears down with sun and regular washing, so most vehicles want a fresh coat every one to three months to keep that black plastic looking sharp. Pro-tip: if your truck lives outside full-time, plan on closer to the one-month mark than three.
A UV Protectant Extends Trim Restorer Between Coats
Between full applications, a light UV protectant spray slows the fading and stretches the time between coats. It won't replace the restorer, but it's a five-minute habit that keeps trim looking fresher, longer. Want to keep the rest of the vehicle looking that good? Check out our full library of car care guides.

Conclusion: Keep That Trim Looking New
A handful of simple steps is all it takes to fix faded trim, cars and trucks alike, and keep it that way for months instead of days. Clean it thoroughly, dry it completely, lay the restorer down in thin coats, wipe off the excess before it sets, and give it a full day to cure before the next wash. Stay on a reapplication schedule and that trim holds its deep black instead of creeping back to gray.
Ready to knock yours out this weekend? 13 Supplies makes exterior car care products built to hold up through sun, rain, and regular washing: the Independence Pack for the clean, Black Ops: Trim & Tire Dressing for the restore, or grab them together in a bundle and save. Everything's made right here in America by a family-owned business, not some corporate conglomerate. That's our story, and it's why a portion of every sale goes to the Wounded Warrior Project. Shop the full lineup at 13supplies.com and give your trim the finish it deserves.
Frequently Asked Questions
Can I use tire shine on plastic trim?
No. Tire shine is made for rubber, not plastic, and it usually leaves trim looking greasy and over-glossy instead of the deep matte-black a real trim restorer gives you. It also pulls in dust and dirt faster than a dedicated trim product, so keep it on the tires where it belongs.
Will restorer come off in the rain?
Restorer that's applied right and given a full cure holds up fine in rain and normal driving. Lay it on too thick, or wash before the 24-hour cure window, and it's a lot more likely to streak or wear off early. Rain usually isn't the real culprit.
How do I remove old, streaky restorer?
Old, streaky restorer needs a dedicated cleaner strong enough to break down the built-up product, followed by a good wipe with a clean microfiber cloth. Once you're back to bare plastic, reapply using the same clean, dry, and restore steps above for an even finish.
Is plastic restorer safe on rubber?
Yes. Most trim restorers, Black Ops included, are safe on rubber pieces like door seals and weatherstripping. Still, check the specific product label first, since formulas vary. When in doubt, test a small hidden spot before you treat the whole piece.
Do I need to prep with an acid cleaner every time?
No, only when the trim is heavily oxidized, meaning deep chalky-gray and not just dusty. For routine touch-ups, your regular exterior cleaner is plenty before you reapply.

Leave a comment
This site is protected by hCaptcha and the hCaptcha Privacy Policy and Terms of Service apply.